Saturday, November 19, 2011

November FNSI Results

Well, quite frankly I didn't accomplish much sewing at grandma and grandpa's house last night.  Not because I went to bed early knowing I had to feed a baby a couple times during the night (nope that would have been smart).  Had to watch the riveting ISU vs Oklahoma State game - and scream and yell with my mom (not even caring if we woke all the kids up).  Because GO STATE! What a game - still on a Cyclone high today!

Anyway here's what I did accomplish.  I actually did this shirt early Friday AM before boys were up and before we left. 

Yes, a little geeky Thanksgiving humor - but little Addie will be sporting her new Pumpkin Pie (pi) shirt this Thanksgiving.


After the boys were in bed and during the less exciting part of the football game I did manage to get a bunch of fish cut out for my fishing game Christmas gift for Grant.  Today I nabbed some washers from dad's stash to use inside of them that will hopefully easily latch onto the magnet on the fishing pole.

I don't have a photo but I also worked on some black suspenders for all three children (Grant needs them especially bad).  They are all cut out and ironed - ready to be sewn together.

I hope to cut out a few more fish tonight.  Grant is working on colors right now so we are going to do a fish in all the major colors.  I also have some iron on felt numbers so counting can be worked in too.  Might as well have it be a dual purpose gift - fun and educational!


Thursday, November 17, 2011

November Friday Night Sew In

Ahh - so desperately needed - a night of sewing.  Yep, the November Friday Night Sew In (FNSI) is tomorrow (see button on right side for link). 

OK - I realize I'm traveling back home tomorrow but I have some hand sewing planned that I can do when I get there (and get the kids settled in bed).  I plan to return home via Ames because the kids and I must stop at the Consignment Store - Clark has absolutely NO pants that fit him.  The children's consignment store just happens to be on the same block as my favorite quilt store so we may have to make another stop as well.

My sewing project is actually Grant's Christmas gift.  Grant is currently into using anything he can find to go "fishing" with.  The plan is to make some cute felt fish with little magnets in their bellies so Grant can go fishing.  Yes, I believe in imaginative play but I am also tired of searching for my good cloth tape measure every time Grant goes on a fishing trip!


Thinking something like this from this blog.

Test Kitchen Thursday - Fa La La La La - Spritz Cookies

Above is Grant this past weekend - two fisting the cookie batter.  Gotta love his enthusiasm!


This weekend we baked 8 dozen Spritz cookies and 12 dozen sugar cookies (Auntie Cookie Recipe found here).  When baking large batches (or prepping for state fair entries) I like to prep my kitchen first.  This means cleaning and organizing everything first.  Then setting out the items that will be used in each recipe (basics like flour, sugar, salt, baking powder, eggs, etc).  When I do this I use the same measuring device for each item or same bowl for mixing dry ingredients, etc.  It really has helped me cut down on the use of bowls, measuring spoons and cups and keeps the process organized and efficient.


Here's the first batch of little spritz trees ready for the oven.  For some reason my cookie press only wanted to pump out trees.  The poinsetta plate gave me fits.

The recipe I used was the Fiori di sicilia Spritz Cookie recipe out of the 2011 Holiday Preview King Arthur Flour Catalogue.  This recipe does use a special ingredient that you can order from King Arthur Flour but you may be able to utilize something else instead.  I have only used the fiori di sicilia in one other recipe and really wanted to try it in something else.  So this truly is a test kitchen for future use as a state fair entry.  I am hoping this recipe sets itself apart enough to yield a ribbon.  They did yield a beautiful citrus scented and tasting cookie.

Recipe:

1 Cup     unsalted butter
3/4 Cup  sugar
1/2 Cup  cream cheese
3/4 t        salt
1 t           vanilla extract
1/4 t        Fiori di Sicilia flavoring
(you may be able to substitute lemon flavoring or just leave out - or go nuts and order the flavoring for some yummy cookies)
1             large egg
2 1/2 Cup  All Purpose Flour
zest of 1 whole orange or lemon, very finely grated (I used orange)
Sugar for decoration (optional)

Preheat the oven to 375 degrees F.  If making shaped cookies through the cookie press freeze the cookie sheets while making the dough.

Beat together the butter, sugar, cream cheese, salt, vanilla, Fiori di Sicilia, and zest.  Beat in the egg yolk, then stir in the flour.

Press/pipe cookies onto the chilled baking sheets.  Top with colored sugar, if desired.


He started out doing so well - each cookie seemed to have more sugar than the last!


Bake the cookies for 8 - 10 minutes, until they are brown around the edges.  Remove from oven and wait 5 minutes before transferring the cookies to racks to cool.  Move cookies before they are totally cool, otherwise they may sitck to the baking sheet.
Yields 7 - 8 dozen cookies.

These do have a great taste.  I love my lime flavored spritz and will probably make a batch of those yet this year too.  And possibly some plain old almond flavored spritz.  They are just so easy and make easy little gifts.  So Spritz 3 ways this year (we've been watching too much Top Chef around here lately).  Funny thing is I don't even like spritz cookies that much or any butter type cookie (which is great to make because they won't end up on my waistline).  Although mom mentioned she found a chocolate/mint spritz recipe that may be worth trying - I look up that recipe when we go visit this week!


Wednesday, November 16, 2011

A Little Turkey Dinner

This week we started "talking turkey" during our preschool time.  Monday we happened to have a turkey and cheese sandwich on the schedule.  I also happened to have my cookie cutters out (well, some of them anyway - my collection of cutters is well into the hundreds - which I don't often admit too since people would probably find me crazy but I love cookie cutters and will pick them up cheap at auctions and yard sales).  Since my husband wonders why we have all these well catorgized, labeled and boxed cutters sitting around I figured I should find new purposes ('cause who needs to make that many cookies?).

The big cutters work great for cutting out sandwich shapes!  We've done acorns, leaves and now turkeys.


Amazingly, Grant who will not eat cut up sandwiches WILL eat cookie cutter cut sandwiches.


The cutters also work well for making playdough shapes, making paper templates and shapes, sorting and organizing fun for the boys and of course for cookies - which we made about 10 dozen cut out sugar cookies this past weekend.  FUN & YUM!

Thursday, November 10, 2011

Test Kitchen Thursday - Banana Muffins and 25 Day Menu Cycle

This week we started something new.  I always try to have a weekly menu plan and shopping list for weeknight suppers.  However, I have been struggling to provide wholesome nutritious snacks and lunches for the boys (and myself).  I usually eat salad for lunch but then wonder what to feed the boys.  Leftovers are often part of the plan but not always.  And just grabbing a box of crackers for snack time is not where I wanted to be.  But it was that or spend lots of time trying to figure out what would be good for snack times.

Enter the Montana Childcare Cycle Menu.  My mom actually gave me this printout a long time ago.  As I was organizing my new recipe book cupboard this fell out.  Maybe God's way of saying you can do better.
It's not just the menu plan for 25 days it also includes recipes (scroll to the bottom - 4 pdf downloads alphabetically).  After visiting their website last week they also have printouts you can download of just snack ideas (look under the menu planning header)!  Hooray!

For those of you that have been reading this blog for awhile you know I like a good challenge.  So, I am challenging myself to follow this meal plan for the entire 5 week cycle.  Obviously Thanksgiving week we will have to take off but I'm hoping this helps relieve some of the pressure to put food on the table during the entire run of the holiday season.  Plus, with an actual plan in hand for groceries maybe also save a little more money to use elsewhere this time of year.

Day 1 Breakfast:  Whole Grain Banana Muffin; Applesauce and Milk.


The recipes are all fairly simple but I have found myself making changes to the recipes.  Mainly to add a few more seasonings.  The recipes are healthy in nature which I love but sometimes just a few ingredients (not neccessarily sugar or salt) can improve a basic recipe.

That said - let's just say my first day I almost quit the program due to some recipe mishaps.

Whole Grain Banana Muffins (recipe source: Montana CACFP - originally sourced from www.pammshouse.com/kidseatveggies.html)

1 Cup    Enriched All Purpose White Flour
1 Cup    Whole Wheat Flour
1/3 Cup Wheat Germ
pinch      Salt (I used 1/8 t)
3 t          Baking Powder
1            Egg, large
1/2 Cup Banana, ripe - mashed (I used 1 whole banana)
1/4 Cup Apple Juice (concentrate, thawed)
1 Cup    Milk (skim)
3 t         Butter (melted)
1/4 Cup Dried Fruit (optional - I opted out this time around)

Preheat oven to 400 degrees. In a mixing bowl combine flours, wheat germ, salt and baking powder. In a separate bowl, beat together the egg, juice concentrate, milk, butter & banana. Add the milk mixture to the dry ingredients and mix until just combined. Fold in fruit, being careful not to over mix. Spray muffin pan with cooking spray. Fill each cup 2/3 full and bake for 15 minutes. Can spread with peanut butter or cream cheese.

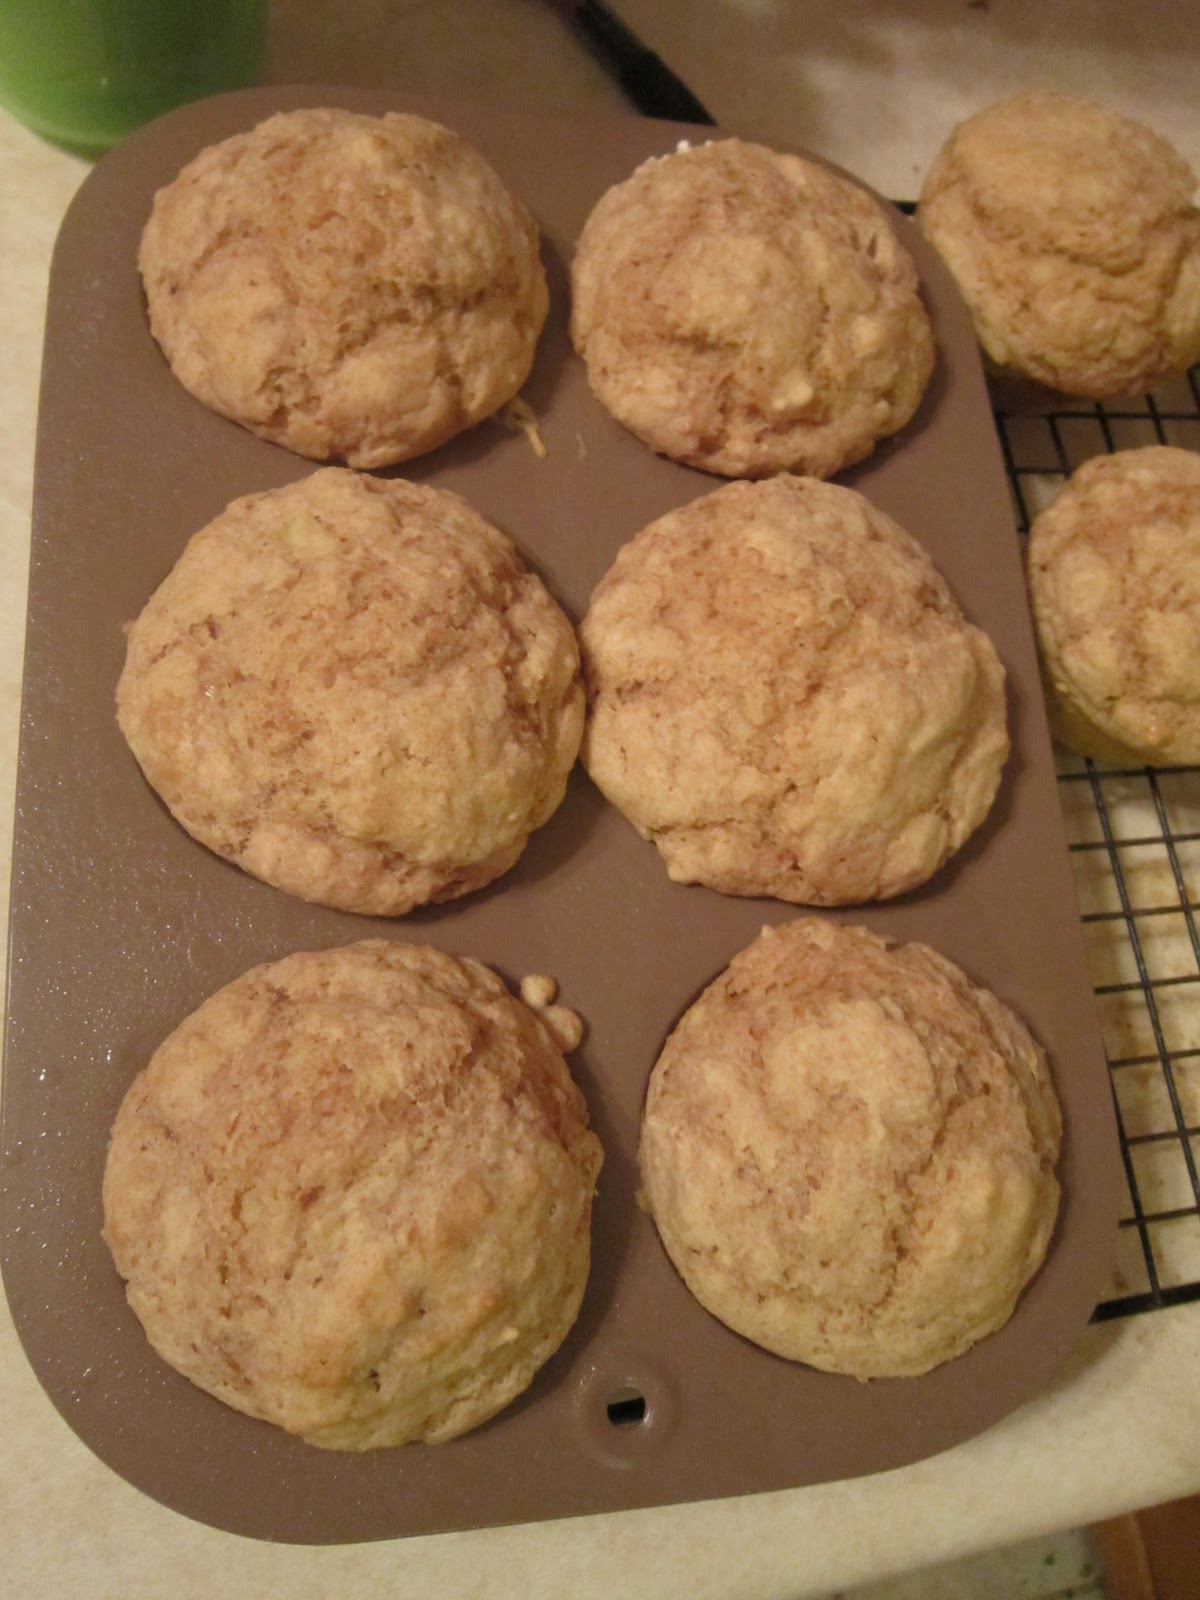
They turned out looking fabulous!  In fact, I don't think I've ever had muffins put on such nice perfect tops.


However, when putting the grocery list together I only read Apple Juice (not concentrate).  My gut instinct told me to add in some sugar along with the apple juice I had but I didn't.  The muffins were a little on the non-sweet side.  After showing the boys how to dip and spread their applesauce on the muffins they ate them right down!


At snack time I made the Taco Chex Mix.  Again, should have gone with my gut instinct.  I know that my homemade taco seasoning has more punch than the store bought variety.  I was going to reduce the amount of taco seasoning but didn't.  It was a very SPICY snack.  Grant is my guy who doesn't like things overly spicy and yet he ate the Chex Mix and loved it (and I had my tongue burning) so who knows.

The best part of the whole week has been ALL of my meals and snacks have been pre-planned and I have all the ingredients needed and on hand.  Having a plan helps me have more time to accomplish other things throughout the day.  The boys love the variety and I love knowing they are getting their dietary requirements met. 

Without the plan on Monday we probably would have resorted to PB&J sandwiches and carrot sticks since I spent 2 hours in the doctor's office that morning.  The banister attacked me on Sunday night and gave me a nasty splinter deep under the nail on my right index finger - bleah!  There was no way I was getting it out and I couldn't take the pain on Monday so off the doctor for some numbing action.  It's amazing how much you take things for granted until you lose them.  Who knew how much you use an index finger?  Meal prep with a numb index finger added a whole new challenge.  Typing was also a problem on Monday and Tuesday (finally got full feeling back Tuesday afternoon - just in time to finish decorating cake and cookies).

Even if you don't want to follow the complete menu plan if you're looking for some easy recipes and snack ideas the links above to the Montana CACFP have some really great things.  They even have guides to help you build your own menu plans.

Cake and Cookies for a Special Day


Tuesday night was the Red Oak FFA Chapter's Degree Raising Ceremony.  For those of you not familiar with FFA the freshmen go through a series of items they need to complete (like memorizing the FFA creed, giving a 5 minute speech in public, etc) to become Greenhand Members and earn their Greenhand Degree.  The older students also have items to complete - mainly dealing with their Supervised Agricultural Experience (basically their work related or science research project they have throughout high school) to earn their Chapter Degree.  Usually it is just sophomore's and newer upperclassmen that are raised to the Chapter Degree.  In this case, almost the entire Chapter had to be raised to the Chapter Degree.


I was asked by my husband to make the refreshments.  Had to call mom for her awesome Hot Apple Cider recipe - so glad I bought a couple coffee makers at an auction a while back because the cider was a big hit.  I put together an FFA Jacket cake - cake recipe blogged here (Classic Vanilla Cake from BHG).  No the emblem is not icing and it's not edible paper - although edible paper would have been cool but I could never justify the expense of an edible printer.  Since it was just regular paper for food safety I put a large slab of yellow frosting underneath and a layer of wax paper and scraped that all off before cutting.

I also whipped up some "Greenhand" cookies.  It didn't work to frost the whole cookie (couldn't tell what it was) so decided to go with just the outline.  Then piped the names of the Greenhand Degree recipients in the middle.  It was fun to see how protective students were of their special cookies.  I decided if I do this again next year I'm going to try dying the cookie dough green. Cookie recipe blog found here.


At the ceremony a mother came up to me and told me her son came home after the first meeting back in September and told her Mrs. Spencer is an awesome baker (Chocolate Zucchini Cake).  She also told me that he now won't miss an FFA meeting for fear of missing the refreshments - no pressure there! Whatever I can do to help my husband get kids to meetings :) - he he. Yesterday after school my husband told me that there is one student who wants to buy a cake from me, another who is in LOVE with the cookies, and a request for a birthday and graduation cake from another.  Hmm - I hadn't considered a cake hobby business on the side - but the students in FFA are sooo sweet here.

In other news - last weekend I organized the toy/preschool room.  Sorry - it was such a horrible mess I did not take before pictures.  Basically you could not see the floor due to toys pulled out and boxes everywhere.  I wanted to surprise the boys so the room was off limits while I cleaned and sorted.  Sunday night we did the big "reveal!"


The boys were so excited!  They love their new room!  All we need is a small loveseat so we have a place to snuggle and read books.  Right now the floor is working OK.  Or instead of furniture a couple of big floor pillows might do the trick too.  Right now I love the Jelly Roll Floor Pillows tutorial on the Moda Bakeshop blog.

The pretend food play area is still their favorite!  On Monday they spread out a baby blanket and "invited" all their stuffed toy friends to a picnic.  It was very cute!

Friday, November 4, 2011

Superman Dresser

Finally finished the boys' dresser!  I posted about the beginning stages back in these posts: post 1 & post 2.


Here is the $1.00 dresser that I picked up at the auction.  After fixing up the drawers and doing some cleaning it came together rather nicely.


Primed the entire piece.

I used a freezer paper stencil to add the superman logo.


Outlined the logo in blue.


I added some new knobs and ta da!  A dresser my boys LOVE!

Total Cost:
$1.00 Dresser
$20.00 Primer and Paint
$15.00 Knobs
$45.00 Dollars for a custom dresser.

Thursday, November 3, 2011

Test Kitchen Thursday - Applesauce Doughnuts


Decided to try my hands at doughnuts one more time.  After last year's disaster I've been a bit gun shy (see post here).  But what is one to do when a little two month old wakes you up for a feeding at 4 AM and you can't fall back to sleep - sure, make doughnuts.

This recipe comes from the 2011 Better Homes and Gardens Fall Baking magazine.  After our trip to the Apple Orchard we had plenty of apples for making applesauce (15 pints) so I had what I needed for the doughnut recipe.


Applesauce Doughnuts

4 Cups all-purpose flour
1 T baking powder
1 T ground cinnamon
1 t salt
1/2 t baking soda
2 eggs
1 egg yolk
1 Cup sugar
1 Cup homemade applesauce (or unsweetened applesauce)
1/2 Cup buttermilk (or sour milk)
1/4 Cup butter, melted

Vegetable Oil for frying

Cinnamon Sugar for dipping in while warm

In a large bowl combine the first 5 dry ingredients, mix well, set aside.  In another large bowl whisk together eggs and egg yolk.  Add the sugar, the applesauce, the buttermilk and the melted butter - whisk until well mixed.  Add the flour mixture to the egg mixture.  Use your hands to mix together until all of the flour is moistened.  Cover and chill dough about 1 hour or until easy to handle.

On a floured surface roll out dough to 1/2" thickness.  Cut dough with a floured 2 1/2 inch doughnut cutter, rerolling dough as necessary.


Fry doughnuts and doughnut holes in deep hot oil (365 degree F) for 2 - 3 minutes or until golden; turning once.  Using a slotted spoon, transfer to paper towels to drain.


Dip warm doughnuts and doughnut holes in Cinnamon Sugar.


These turned out really well.  The boys were super excited to have doughnuts for breakfast.  Although now that Grant knows that we can make our own doughnuts he is upset we don't have them more often.  Grant really liked the little doughnut holes the best.


Wednesday, November 2, 2011

Pumpkin Night

Halloween Night found us carving pumpkins!


First the boys each drew a face on their pumpkin.


Grant has a thing with mini - pumpkins so we just let him color his own pumpkin.  Daddy asked him what he wanted for a face - he said happy so his pumpkin received a happy face.


The boys carving and scooping goop.  Have to save the seeds for roasting.


 Grant with his pumpkin - he wanted to hold onto it the whole time it was lit.


Clark next to the upside down face that he and daddy thought was amazingly funny.


Our pumpkins on display.  It was such a nice night even Addie came out for a short time to join the family fun.


Can't believe it's November already!  Roasted the pumpkin seeds today and can't wait to have them for snack time this week.  We started our Thanksgiving count-down calendar on the 1st and are having fun working with the boys on showing gratitude and giving thanks.

Friday, October 28, 2011

Trick or Treat

Last post I mentioned that the boys decided not to wear the costumes we had planned on.  Maybe deciding to find and open the toy box full of our costumes and pretend play items two days before Red Oak's Trick or Treat on the Square night was not mom's best decision.

Clark's Darth Vader costume that we bought last year at the consignment store (on sale) fit perfectly but I think Clark has a thing with masks and decided he didn't want to wear the costume.  Grant's dragon costume from last year was a bit too small and the dragon/dinosaur costume Clark has worn the past two years is still too big for Grant.  The vast majority of the other costumes are rather female in nature (witch, mouse, prairie girl dress and bonnet, etc.).  Luckily I did this before our monthly trip to Council Bluffs (to go to Walmart, Target and Sam's Club).  The boys were immediately drawn to the knight's sword, shield, and helmut in the toy box.  Both decided they wanted to be knights and fight dragons. (They also thought Addie should be a princess but I wasn't going there this year).

Picked up a new sword and shield for Grant for under $5.00 that actually had the exact same dragon insignia as the items we already had at home. We luckily found some great fabric for $13.00 at Walmart. 


That worked its way into awesome knight's suits on Wednesday.  Two costumes done before 4:30 PM and the Trick or Treat night.  Good thing Addie had me up at 4:30 AM for her morning feeding.  I have enough fabric left over that I could also make "chain mail" pants but ran out of time yesterday.  I also have the black fabric to make "boots" and belts. 

It's hard to see in the photo but the sleeves and hood look like chain mail.   I used a shiny silver lamine under a shiny grey sports apparel fabric (like used for shorts) that has holes built in.  It looked pretty neat and actually shined in the sun.
Addie went in her little kitty outfit.


And later when it cooled off more we tucked her into the traditional baby hot dog costume.


Better view of the "chain mail" effect on the boys' costumes.
Happy Halloween!

Wednesday, October 26, 2011

Turning 2 Months Old

Busy, busy week!  Last week we were in Indianapolis for the National FFA Convention. 

To catch you up - yes I finished two new kids FFA jackets just in time for the convention and completed my Kids Clothing Week Challenge!  Addie's jacket went together in 2 hours!  Getting lots better at sewing jackets.  I'll put the FFA Convention in a seperate post.

This week Addie turned 2 months old!  Here's a video of what she's up to now.


And Addie's 2 month picture.

Other than that we've been working hard getting everything shored up outside before colder and more inclimate weather sets in.


This has also been a busy work week prepping sponsorship materials and preparing info for teachers.  To top it all off the boys completely changed their minds on Halloween costumes so I have $13.00 worth of fabric we picked up today ready to sew into Knight's tunics.  Luckily we had the swords and shields in the pretend play toy box so no cost there. (What were they going to be? Clark was set to be Darth Vader - a costume we bought last year but he didn't want to wear and Grant was going to be a dinosaur/dragon.  But Clark decided he wanted to be a knight after seeing the stuff in our pretend play box.  Thought it would be neat if Clark was a knight and Grant was a dragon - but no, Grant also wants to be a knight.)

Friday, October 14, 2011

Test Kitchen Thursday - Pear Pie Bars

Like last week's post this recipe again comes from one of those pesky special interest magazines that seem to grab my interest.  This time it is the Better Homes and Gardens 2011 Fall Baking magazine.

Due to some issues with ingredients I did have to modify the recipe - I'll make those designations in the recipe itself.  All in all I didn't actually enjoy these bars as much as I thought I would.  Good for my waistline I guess.  However, Grant, my husband and my father-in-law thought they were great.  Clark left some on his plate so I take that to mean he wasn't a fan either.  So, you may just have to try them yourself to decide.  (Note:  they seem to get better if left to sit overnight)

I think part of my reasoning for not enjoying them as much was the recipe reminded me very much of my mom's Apple Slices.  Very similar look and method but maybe the apples just add the right amount of sweet/tart that the pear's didn't provide.  Everything about the recipe technically turned out just right - good consistency, ate like a bar as stated, good aroma, pretty appearance. 


Before moving on to the recipe I just have to tell this little story.  Clark was helping me with the recipe this afternoon and he would ask me what the instructions said to do next.  At one point he asked, "Mommy, does it say next to take a picture?"  Observant boy - he's so used to the camera in the kitchen I didn't think he noticed it anymore.  I explained that the pictures were a step mommy added for fun.  His 4 year old response, "Well, we would get it in the oven a lot faster without those steps."  So true my boy, so true!

Five Spice Pear Pie Bars from the 2011 Better Homes and Gardens Fall Baking magazine.

Pastry Crust:
3 Cups all-purpose flour
2 Tablespoons sugar
1/2 teaspoon salt
1/2 Cup shortening (used butter flavored shortening)
1/2 Cup cold butter (used unsalted butter)
2 egg yolks, beaten
1/3 Cup milk
2 Tablespoons water

Filling:
6 Cups peeled, cored, and thinly sliced ripe pears (about 6 - 7 medium)
1 Cup sugar
1 Cup crushed cornflakes (if I try again might use oatmeal instead)
1 teaspoon five-spice powder (was unable to find this so used 1/2 t cinnamon, 1/4 teaspoon ground cloves and 1/4 teaspoon nutmeg)

Orange Icing:
1 1/2 Cups powdered sugar
1 teaspoon grated orange peel
1/4 teaspoon vanilla
1 - 2 Tablespoons milk

For pastry, in a large bowl combine flour, sugar and salt.  Using a pastry blender, cut in shortening and butter until pieces are pea sized.  In small bowl whisk together the yolks and milk.  Gradually stir the egg yolk mixture into the flour mixture, tossing with a fork to moisten.  Sprinkle 1 - 2 tablespoons of the water over the mixture, gently tossing until all of the mixture is moistened.  Gather mixture together.  Divide pastry into two portions, making one portion slightly larger than the other.  Wrap and chill until needed.


For filling, in an extra large bowl combine pears, sugar, cornflakes and the five-spice powder (or other spices).  Set aside.

Preheat oven to 350 degrees F.  Use your hands to pat the larger portion of pastry into the bottom (sprayed with baking spray first) of a 15 x 10 x 1 inch pan. 


Spoon filling evenly into pastry-lined pan.

  Roll the remaining pastry portion between two sheets of waxed paper to a 15 x 10 inch rectangle.  Carefully peel off top sheet of waxed paper.  Invert the rectangle, pastry side down, over the filling.  Carefully peel off waxed paper. 


Press over top.  Make sure there are a few slits in the top pastry and brush lightly with egg white.


Bake in preheated oven for 45 - 50 minutes or until pastry is golden, fruit is tender and filling is bubbly.  Cool completely in pan on a wire rack. 


Drizzle with the Orange Icing.  Let stand until icing is set. Cut into bars.  Yield: 32 bars.


For icing:  in a medium bowl stir together powdered sugar, orange peel, vanilla and enough of the milk to make icing a drizzling consistency.

Enjoy!

My goal was to make these on Tuesday so I could have the post pre written and ready to go on Thursday morning.  However, the boys ate all the pears I had bought for the recipe so I had Alan purchase some pears to bring home Monday night but should have specified they needed to be ripe.  Then my internet connection broke down on Thursday when trying to post.  So, finally its up and ready!